Tuesday, October 31, 2017

Spooktacular


Happy Halloween!  

Here are two of the Tonic Studios Spooktacular Coffin Treat Boxes I made for Halloween this year.  I love this die set and made quite a few!

These die cuts are just a few of the dies included in this huge set of 23 dies.

All of the papers on the treat box are also Tonic Studios: Mirror Cardstock High Gloss-Glossy Black and Mirror Cardstock Satin Effect-Purple Mist.  The skeleton was cut from white cardstock (all of his pieces are separate so you can pose him anyway you like) with a bit of Antique Linen dabbed on for an aged look.

Black Ice glitter was applied to the top hat and Nuvo Crystal Drops (Red Berry) accents the spiders' bellies.


Here are the sides:


Now I have a special treat for you: they are 50% off at the Sparkle N Sprinkle shoppe.  Quite a few of the Tonic Studios Halloween dies are being retired.  Here is the link to the Retired products page.


Wishing you a Spooktacular Halloween!💀


Wednesday, October 18, 2017

Hydrangea {Scrapy Land #76}


It's time for a new Scrapy Land Challenge.  The theme is always Anything Goes using any brand of die that Scrapy Land sells.

I used the following dies for this project:
Sue Wilson Designs: Noble dies-Double Pierced Rectangles, Set B
Elizabeth Craft Designs: Hydrangea 2
Elizabeth Craft Designs: Fitted Circle
Taylored Expressions: Label Stacklets 1

I started out by die cutting the focal mat with the Sue Wilson dies.  I then ran it through my machine again to dry emboss the edges.  Next I used various Nuvo Embellishment Mousse and a Tim Holtz stencil (clockwork).

The circle was die cut from white cardstock, colored with a Copic marker, and then I used a Spectrum Noir Sparkle marker (Crystal Clear) to give it added bling.


After using the direct to paper method to color some white cardstock with Distress Inks, I added VersaMark and heat set this with Clear embossing powder.  I then die cut the individual petals and shaped them. I wanted each blossom to have a dewy look.

The sentiment was stamped on to cream colored cardstock, die cut, and then pop dotted.  I combined various strips from leftover projects to finish of my card.

Now it's your turn to come play with us.  You have until October 29 to join in on the fun.  There are two winners, one chosen by random.org and the other chosen by the Designers.  Each winner will receive a $10 gift certificate to Scrapy Land.
Be sure to check out what the rest of the Designers have created for this Scrapy Land Challenge.


Monday, October 9, 2017

Birdhouse Friends


I had a lot of fun creating this double slider card using the newly released Birdhouse Friends stamp set from Sparkle N Sprinkle.


open
This stamp is not a solid stamp, so when you ink it up, you just get the detailed lines.  I wanted to create a silhouette so that the pop of color came from the background panels.  I have to say, I couldn't have created this technique without using the Tim Holtz Stamp Platform (although you could use any type of stamp positioner).

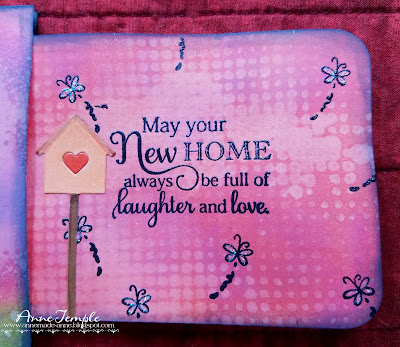
I began by creating my background panels.  I used several different colors of Distress Oxides and Distress Inks (Abandoned Coral, Fired Brick, Seedless Preserves, Peeled Paint, Black Soot).  Once the colors were the way I liked them, I laid down a Tim Holtz stencil (Dot Fade) and spritzed each of the panels with a homemade sparkly concoction (you could also use Perfect Pearls Mist).  It's very subtle and the shimmer doesn't show up very well in the photo, but it looks great in person.


Next I began with the center (focal) panel.  Using my Stamp Platform, I stamped the Birdhouse Friends image with Memento Ink (Tuxedo Black).  Be sure to leave the stamp in place!  Then I colored the entire image with a dark grey (or a black) Copic marker.

Once it was colored, I placed the cardstock back on the Stamp Platform and stamped the image with VersaFine. Then it was heat set with Clear Detail embossing powder.  This allowed ALL the details of the stamp to still show up on the solid color.

left panel
On both the left and right panels, I stamped one of the sentiments from the set using VersaFine and heat setting with Clear Detail embossing powder.

I also stamped the little butterfly multiple times. Glue (Sakura Glue Pen) was added to the wings of all the butterflies and covered with Bubble Gum glitter for lots of sparkle.

Right panel
The birdhouses on each of the side panels were die cuts from white cardstock using an Impression Obsession (Birdhouse set) die.  They were colored with Copics and adhered with Nuvo Deluxe Adhesive.

This was such a fun technique to do and I definitely plan on doing it again soon.